
This post is the second post on the series A trick you don’t know about Python: MATLAB.
Data labeling, selecting suitable features for your problem, choosing the appropriate model from dozens of options, running multiple deep learning experiments, etc. You might find occasions where the development of such a task in Python can be tedious and time-consuming. To this end, the following examples showcase how you can facilitate your development in Python by using a simplified MATLAB workflow and integrate your MATLAB code in Python.
Simplifying data preparation using Image Labeler App from Python
Data preparation is key in developing Machine Learning and Deep Learning applications. No matter how much effort you put into your ML model, it will likely perform poorly if you didn’t spend the right time in preparing your data to be consumed by your model.
In this example, we start with a set of images to label for a Deep Learning application.
import os
cwd = os.getcwd()
vehicleImagesPath = os.path.join(cwd, "..", "images", "vehicles", "subset")
We then start the MATLAB Engine API for Python and open the Image Labeler App, passing the location of the images as an input:
import matlab.engine
eng = matlab.engine.start_matlab('-desktop')
eng.imageLabeler(vehicleImagesPath, nargout=0)
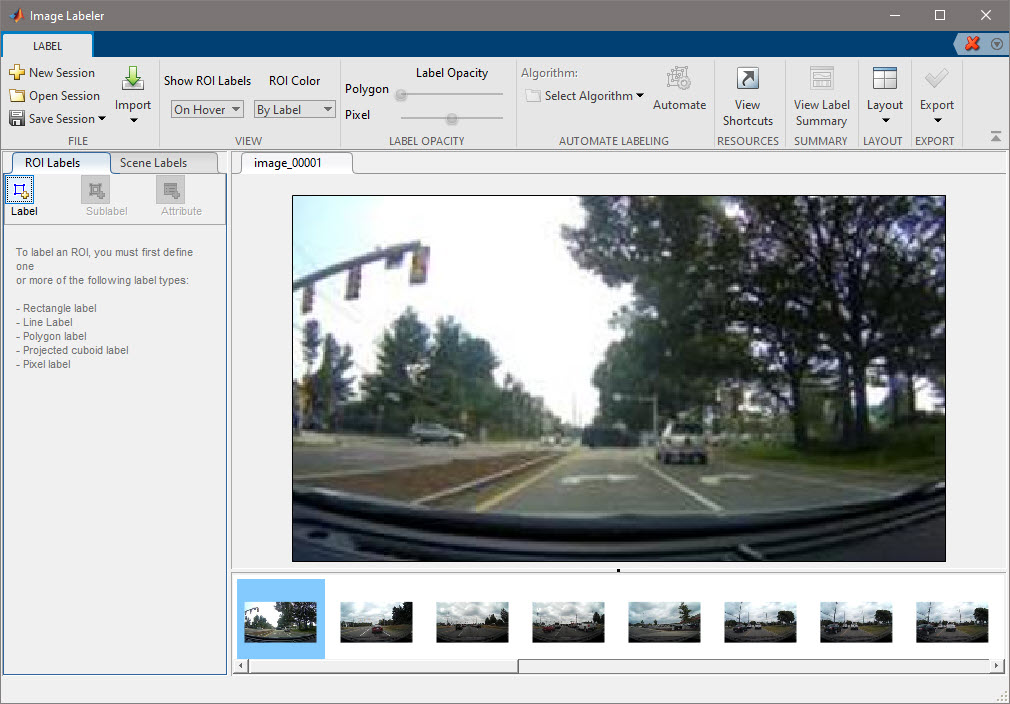
Note that because the App returns no output arguments back to Python, you need to specify nargout=0 (number of output arguments equals 0).
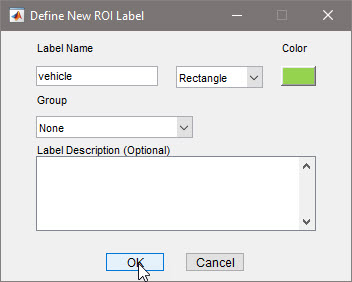
Now you can interactively create a new ROI Label:
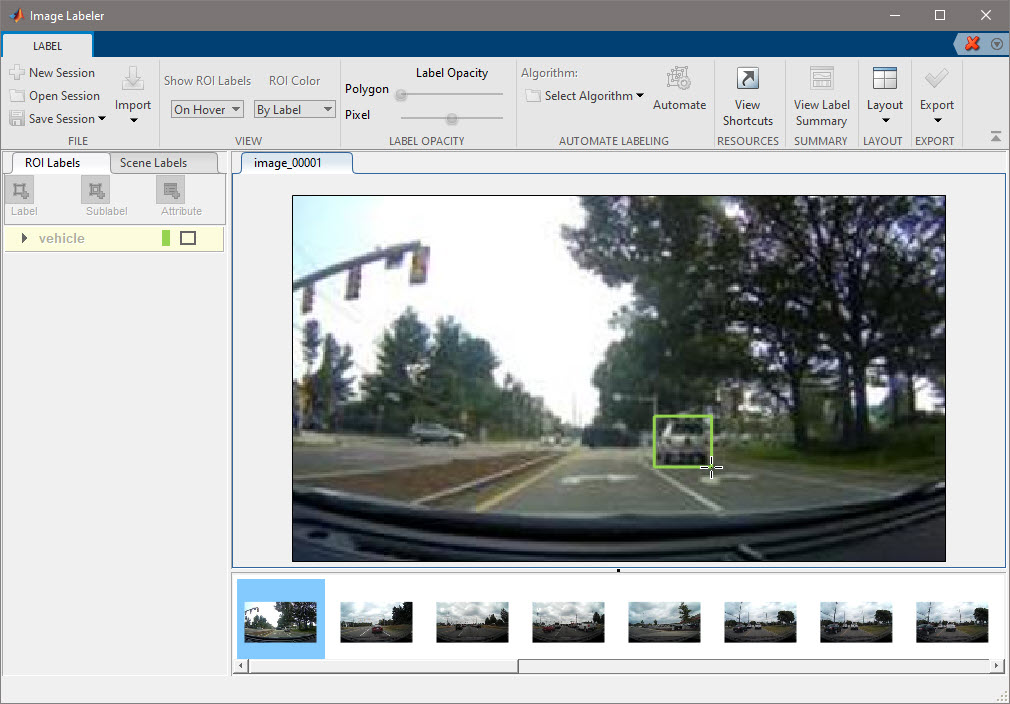
and start to manually label your vehicles:
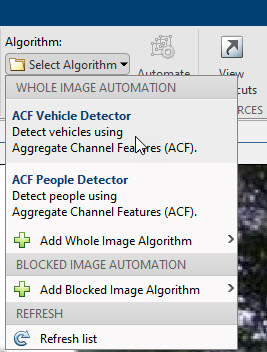
This process is rather tedious, especially considering that the number of required labeled images for the problem might be significant for Deep Learning workflows. Thus, the following shows how to facilitate labeling by automating (or semi-automating) the labeling process. After selecting the images you would like to automatically label, you can choose among various algorithms (ACF vehicle detector, ACF people detector, or import your custom detector). In this particular case, after choosing ACF vehicle detector, the selected images are automatically labeled. Earlier I mentioned that the process is semi-automated, as it might not detect all vehicles, or you might want to correct some bounding boxes before exporting your results.
Finally, export your labeling process as a MATLAB table to continue your work back in Python:
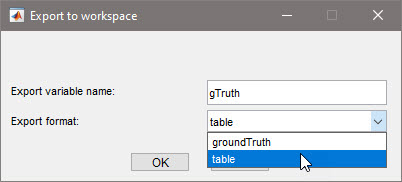
Back in Python, gather the variables you are interested in:
imageFilename = eng.eval("gTruth.imageFilename")
labels = eng.eval("gTruth.vehicle")
and put them into a convenient form to continue your work:
import pandas as pd
import numpy as np

# Bring data to convenient form as DataFrame
labels = [np.array(x) for x in labels]
df = pd.DataFrame({"imageFileName":imageFilename, "vehicle":labels})
Labeled data is now conveniently shaped into a DataFrame with information regarding file location and bounding boxes for each vehicle, and can be easily accessed:
df.iloc[[13]]
| imageFileName | vehicle |
|---|---|
| c:\sandbox\a-trick-you-dont-know-about-python-matlab\images\vehicles\subset\image_00020.jpg’ | [[ 32.0, 118.0, 40.0, 25.0], [ 76.0, 110.0, 40.0, 25.0], [128.0, 107.0, 52.0, 50.0]] |
Finally, you can close the engine and continue with your Python-based Deep Learning development workflow.
eng.exit()
Simplifying model selection using Regression Learner App from Python
It’s clear that once you know which model fits your data best, it’s just a matter of what implementation of that model you use. In my experience, getting to that conclusion is not an easy process. In this sense, this example shows how to leverage Regression Learner App to come up with the best machine learning model, given some training data, and then use that model for inference.
Let’s start up by faking some data (just pretend we got this data from somewhere):
import numpy as np
X = np.random.rand(1000,2)
y = np.dot(X, np.array([3,2])) + 0.5 # 3*x1 + 2*x2 + 1/2
Like earlier, we import and start the MATLAB Engine and convert the training data X and y to the expected data type (matlab.double):
import matlab.engine
eng = matlab.engine.start_matlab('-desktop')

X_ml = matlab.double(X.tolist())
y_ml = matlab.double(y.tolist())
y_ml.reshape((y.size,1))
We then open the Regression Learner App, passing the input arguments X_ml and y_ml, to interactively come up with an adequate Machine Learning model:
eng.regressionLearner(X_ml, y_ml, nargout=0)
This starts a new session in Regression Learner App, automatically selecting the provided input variables:
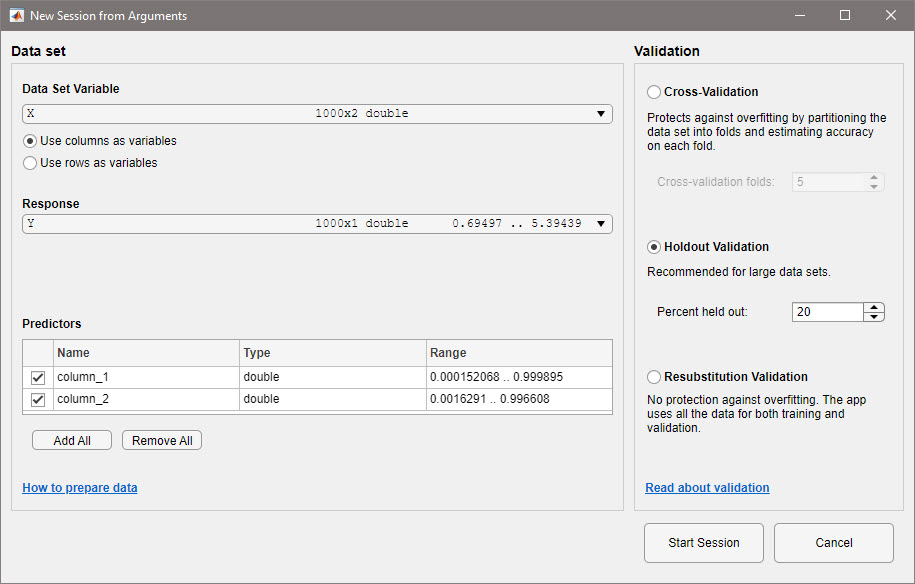
After selecting the desired validation method, the data is split into training and validation, allowing you to review your features, enable PCA analysis, and choose among a wide range of available models (including linear regression models, regression trees, support vector machines, gaussian process regression models, ensemble of trees or neural networks).
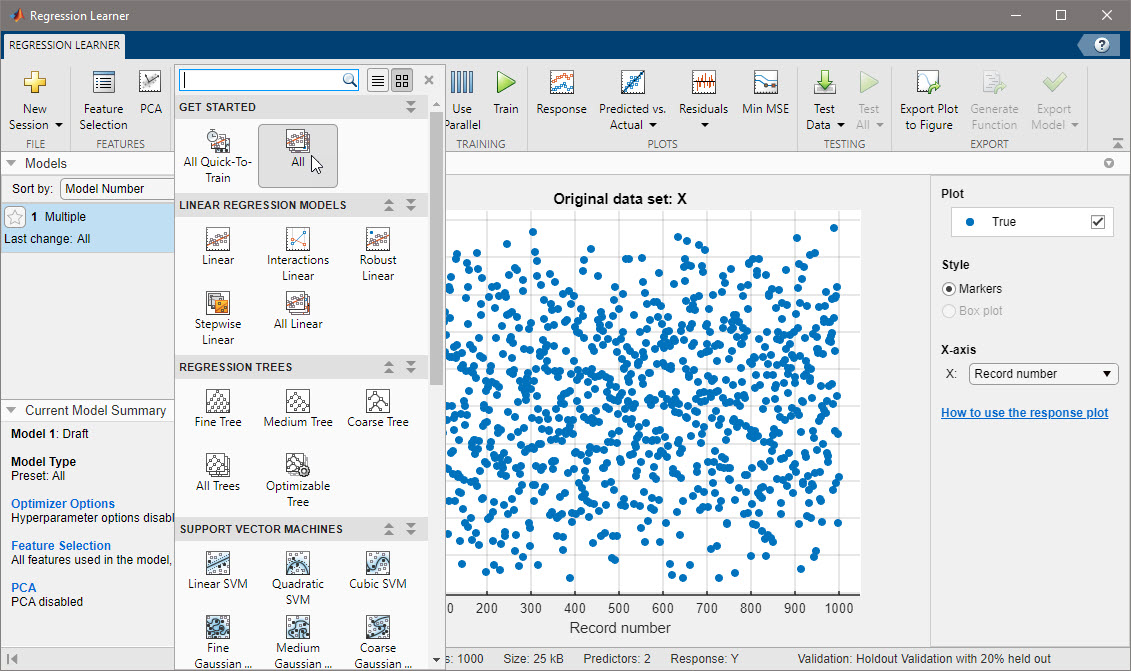
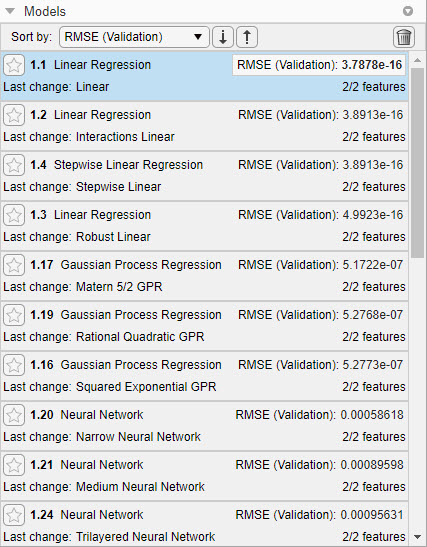
Once trained, you may choose the most appropriate model according to your criteria, import additional test data to validate, generate MATLAB code and export the model to the MATLAB workspace):
MATLAB code is generated for the selected model by clicking the Generate Function button. This allows to easily automate the training process back from Python:
res = eng.trainRegressionModel(X_ml, y_ml, nargout=2)
outputting two outputs: a MATLAB struct containing the trained regression model (res[0]) and the RSME for the validation data (res[1]). Given the MATLAB struct gets returned to Python as a Python dictionary, you can inspect the dict object:
import pprint as pp
pp.pprint(res[0])
{'About': 'This struct is a trained model exported from Regression Learner '
          'R2021a.',
 'HowToPredict': 'To make predictions on a new predictor column matrix, X, '
                 'use: \n'
                 '  yfit = c.predictFcn(X) \n'
                 "replacing 'c' with the name of the variable that is this "
                 "struct, e.g. 'trainedModel'. \n"
                 ' \n'
                 'X must contain exactly 2 columns because this model was '
                 'trained using 2 predictors. \n'
                 'X must contain only predictor columns in exactly the same '
                 'order and format as your training \n'
                 'data. Do not include the response column or any columns you '
                 'did not import into the app. \n'
                 ' \n'
                 'For more information, see <a '
                 'href="matlab:helpview(fullfile(docroot, \'stats\', '
                 "'stats.map'), "
                 '\'appregression_exportmodeltoworkspace\')">How to predict '
                 'using an exported model</a>.',
 'LinearModel': <matlab.object object at 0x0000023AC628EC10>,
 'predictFcn': <matlab.object object at 0x0000023AC628EF30>}
and get the value (MATLAB function handle) for the predict function:
predFcn = res[0]["predictFcn"]
We can then use some test data (again, sorry for my lack of imagination when creating the data…),
X_test = np.array([-1,2])
convert it to the appropriate matlab.double array, so that MATLAB Engine can deal with it, and call the predict function stored in predFcn by using the feval MATLAB function (to evaluate a MATLAB function given a function handle):
X_test = matlab.double(X_test.tolist())
y_test = eng.feval(predFcn, X_test)  # 3*x1 + 2*x2 + 1/2
y_test
1.4999999999999996
Finally, we close the MATLAB Engine:
eng.exit()


Comments